
After more than a decade of helping millions of homeowners protect their HVAC systems and indoor air, we’ve seen firsthand how under-insulated homes quietly drive up energy bills and force heating and cooling equipment to work harder than it should.
Our blown-in insulation calculator takes the guesswork out of your next upgrade. Enter your square footage, current insulation depth, and target R-value, and you’ll get a straightforward estimate of material needs, approximate cost, and potential energy savings.
Whether you’re topping off attic insulation or starting fresh, this tool and guide will help you make a confident, budget-friendly decision — no contractor pressure required.
TL;DR Quick Answers
What Is a Blown-In Insulation Calculator?
A blown-in insulation calculator is a tool that estimates how much loose-fill insulation material you need — and what it will cost — based on three simple inputs:
- Square footage of the area you’re insulating
- Current insulation depth (if any exists)
- Target R-value for your climate zone
The result gives you:
- Total material depth needed
- Approximate number of bags to purchase
- Estimated project cost
Top 5 Takeaways
- Start with data, not guesswork. A blown-in insulation calculator estimates your material needs and costs using three inputs: square footage, current insulation depth, and target R-value. Good numbers in = a project you can budget with confidence.
- Your climate zone sets the target. DOE and ENERGY STAR recommend R-30 to R-60 for attics, depending on where you live. Get this number right first — everything else builds on it.
- The savings start on day one. The EPA estimates a 15% reduction in heating and cooling costs with proper insulation and air sealing. Over half your home’s energy goes to heating and cooling — insulation tackles that directly.
- Insulation + filtration = the full solution. After 10+ years and millions of filters shipped, here’s what we know: insulation keeps conditioned air in, filtration keeps pollutants out. Together, they lower your bills, extend your equipment’s life, and clean your air. Skip either one and you’re leaving performance on the table.
- Upgrade your filter right after you insulate. A well-insulated home changes how your HVAC system operates — and makes your air filter’s job more important than ever. Match your MERV rating to your needs and set up auto-delivery so it’s one less thing to remember.
What Is Blown-In Insulation?
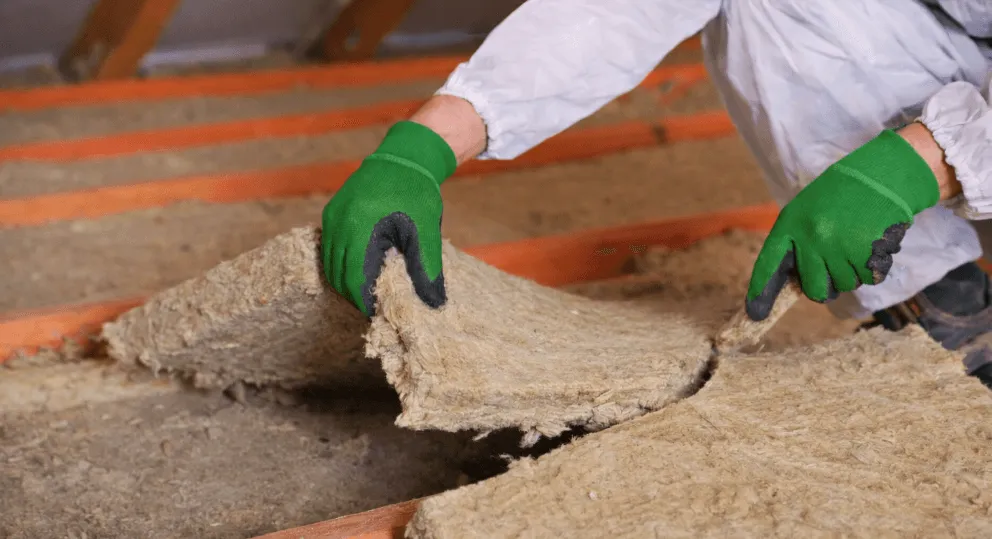
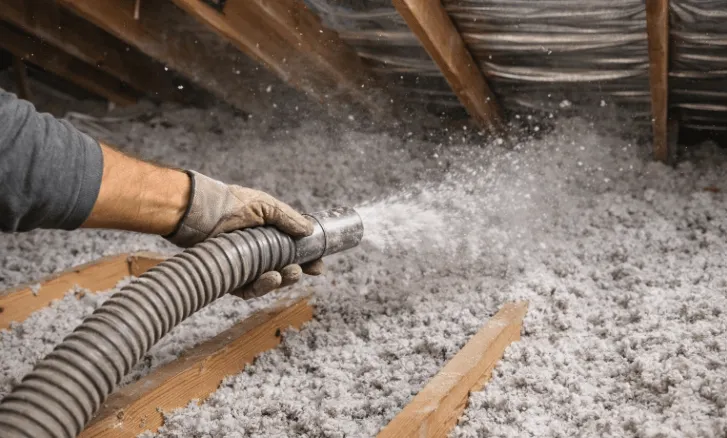
Blown-in insulation is a loose-fill material — typically fiberglass, cellulose, or mineral wool — that’s installed using a blowing machine to fill attics, wall cavities, and other hard-to-reach spaces. Unlike rolled batts that require precise cutting and fitting, blown-in insulation conforms to irregular gaps, joists, and obstructions, creating more consistent thermal coverage with fewer weak spots.
How the Blown-In Insulation Calculator Works
Our calculator is designed to give you a reliable estimate in under a minute. You’ll enter three key inputs: the total square footage of the area you’re insulating, the current depth of any existing insulation, and your target R-value based on your climate zone. The calculator then determines how much additional material you’ll need, the approximate number of bags required, and an estimated project cost.
R-value is simply a measure of how well insulation resists heat flow — the higher the number, the better the thermal protection. The U.S. Department of Energy recommends different R-values depending on where you live, ranging from R-30 in mild southern climates to R-60 or higher in northern regions. If you’re not sure what R-value to target, our calculator includes recommended ranges by climate zone so you don’t have to guess.
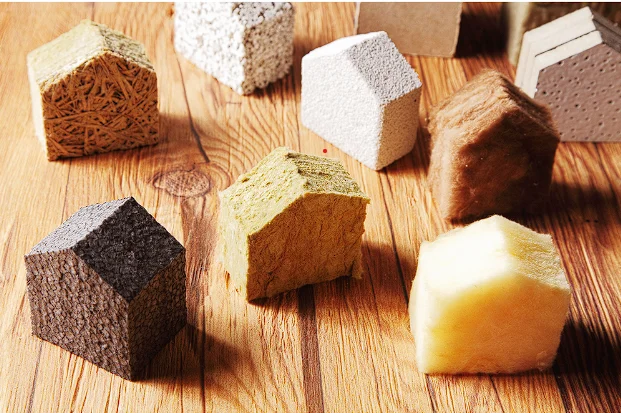
Blown-In Insulation Types Compared
Not all blown-in materials perform the same way, and the right choice depends on your budget, your home’s needs, and where you’re installing it.
Fiberglass is the most widely available and affordable option. It’s naturally fire-resistant, doesn’t absorb moisture, and won’t settle as much over time. It typically delivers around R-2.2 to R-2.7 per inch of depth.
Cellulose is made from recycled paper treated with fire retardants. It packs more tightly than fiberglass, offering roughly R-3.2 to R-3.8 per inch, which means you may need less depth to hit your target R-value. However, it can absorb moisture in humid environments if not properly sealed, something we often remind homeowners in coastal or high-humidity regions to factor into their planning.
Mineral wool (also called rock wool) offers excellent fire resistance and soundproofing, with an R-value of about R-3.0 to R-3.3 per inch. It’s less common for blown-in applications, but it is a strong choice for homeowners who want added acoustic benefits or extra fire protection.
How Much Can You Save on Energy Costs?
The potential savings from adding or upgrading blown-in insulation are significant — and they start showing up on your very first utility bill. According to the EPA’s ENERGY STAR program, sealing and insulating a home properly can save an average of 15% on heating and cooling costs, and in some cases considerably more for homes that are severely under-insulated.
Here’s what we’ve learned from years of helping homeowners optimize their HVAC systems: insulation and air filtration work together. When your home is well-insulated, your heating and cooling system doesn’t have to run as hard or as long to maintain a comfortable temperature.

“After helping millions of homeowners protect their HVAC systems over the past decade, one thing we see again and again is that insulation and air filtration aren’t separate projects — they’re two sides of the same coin. When your home is properly insulated, your system runs less, your filters last longer, and the air your family breathes is cleaner because of it.” — The Filterbuy HVAC Team
7 Resources We Recommend Before You Start Your Blown-In Insulation Project
Look — we know you’ve got a lot on your plate. Between work, family, and keeping your home running smoothly, the last thing you need is to fall into a rabbit hole of insulation jargon and confusing R-value charts. So we did the homework for you.
After more than a decade of helping homeowners get the most out of their HVAC systems, we’ve learned that the folks who get the best results from insulation upgrades are the ones who take a few minutes to understand the basics before they buy. These are the seven resources we’d point you to if you were standing right here asking us where to start.
1. Figure Out What R-Value Your Home Actually Needs
Here’s the thing about R-value — it’s not one-size-fits-all. What you need depends on your climate, the type of heating and cooling system you have, and which part of the house you’re insulating. The DOE’s guide breaks all of that down without making your eyes glaze over. If you only read one resource before using a blown-in insulation calculator, make it this one.
Why it matters: Plugging in the wrong R-value means you’ll either overbuy material or — worse — under insulate and keep overpaying on energy bills.
Source: U.S. Department of Energy — Insulation Guide
URL: energy.gov/energysaver/insulation
2. Look Up Your Region’s Recommended Insulation Levels in 30 Seconds
Not everyone has time to read a full government guide, and we get that. This ENERGY STAR page gives you a straightforward table with cost-effective insulation levels for different climates and areas of the home. Think of it as the cheat sheet version — find your zone, get your number, and move on with your day.
Why it matters: It takes the guesswork out of setting your calculator’s target R-value, so you can spend less time researching and more time getting the job done.
Source: ENERGY STAR — Recommended Home Insulation R-Values
3. See What Homeowners Like You Are Actually Saving on Energy Bills
We talk to homeowners every day who are surprised by how much their HVAC system is working overtime because of poor insulation. The numbers back it up: the EPA estimates that homeowners can save an average of 15% on heating and cooling costs by air sealing and adding insulation in attics, floors over crawl spaces, and basements. This page also covers the everyday comfort problems — cold floors, stuffy rooms, drafts — that proper insulation can fix.
Why it matters: When you can see the real dollar savings, it’s a lot easier to justify the project. And from our experience, homeowners who insulate properly also put less strain on their HVAC equipment, which means fewer repair calls and a longer system lifespan.
Source: ENERGY STAR — Why Seal and Insulate?
URL: energystar.gov/saveathome/seal_insulate/why-seal-and-insulate
4. Find Out If You Can Still Get a Tax Credit for Your Insulation Upgrade
Nobody likes leaving money on the table, and this is one of those details worth checking before you schedule your project. Through 2025, homeowners could claim 30% of qualifying insulation material costs, up to $1,200 per year. But here’s the catch — recent federal legislation has moved the expiration timeline up, so what’s available for 2026 projects may look different. Check this page directly so you know exactly where things stand.
Why it matters: That credit could cover a meaningful chunk of your material costs. A few minutes of checking could save you hundreds of dollars.
Source: IRS — Energy Efficient Home Improvement Credit
URL: irs.gov/credits-deductions/energy-efficient-home-improvement-credit
5. Match Your Climate Zone to the Right R-Values — Visually
Some people are visual learners (no judgment — we’re the same way with MERV rating charts). This DOE page pairs a color-coded climate zone map with a clean R-value table broken out by building component, so you can see exactly what your area requires at a glance. It also connects you to resources from ENERGY STAR Home Upgrade and the Building America Solution Center for deeper guidance on common home upgrades.
Why it matters: One page, one map, one table. Everything you need to confirm your insulation targets without bouncing between five different websites.
Source: U.S. Department of Energy — Insulation & Air Sealing Tax Credit Essentials
6. Get a Cellulose-Specific Bag Count and Cost Estimate
Going with cellulose? Smart choice for a lot of homes — it packs tightly, fills gaps well, and it’s made from recycled materials. Greenfiber’s calculator is built specifically for their product and factors in your target R-value and square footage to estimate how many bags of cellulose insulation you’ll need. It even accounts for existing insulation, so if you’re topping off what’s already up there, you won’t overbuy.
Why it matters: Generic calculators can leave you guessing on bag counts. This one is dialed in for cellulose, so you get a number you can actually take to the store — or use to keep a contractor’s quote honest.
Source: Greenfiber — Blown-In Cellulose Insulation Calculator
URL: greenfiber.com/documents-and-tools/insulation-calculator
7. Plan Insulation Across Your Entire Home — Not Just the Attic
If you’re thinking bigger than just the attic (and honestly, you should be), JM’s calculator is the most comprehensive free tool we’ve found. It walks you through your project details — stud depths, stud widths, total square footage — and recommends the right type and quantity of insulation plus the tools and supplies you’ll need. Attics, walls, ceilings, basements, garages — it covers the whole house.
Why it matters: The attic gets all the attention, but walls and basements lose a lot of conditioned air, too. A whole-home approach gives you the biggest energy savings — and keeps your HVAC system from working harder than it has to.
Source: Johns Manville (JM) — Insulation Calculator
URL: jm.com/en/insulation-calculator
What the Data Tells Us — And What We’ve Seen Firsthand
These three government-sourced statistics confirm patterns we see every day.
1. Insulation Can Cut Heating & Cooling Costs by 15%
The EPA estimates homeowners can save an average of 15% on heating and cooling costs by air sealing and adding insulation in attics, floors over crawl spaces, and basements.
Source: EPA / ENERGY STAR — Why Seal and Insulate?
2. Over Half Your Energy Bill Goes to Heating & Cooling
According to the U.S. Energy Information Administration, 52% of an average household’s annual energy consumption in 2020 went to just two end uses: space heating and air conditioning.
Source: U.S. Energy Information Administration — Use of Energy in Homes
3. Americans Spend 90% of Their Time Indoors
The EPA reports that we spend approximately 90% of our time indoors, breathing air that can contain higher concentrations of certain pollutants than outdoor air.
Source: U.S. EPA — Indoor Air Quality (IAQ)
Final Thoughts and Opinion
Most blown-in insulation guides stop at R-values and bag counts. After more than a decade of manufacturing air filters in the U.S. and shipping them to millions of homes, we think that’s only half the story.
Our perspective: The real value of insulating your home isn’t just about lowering your energy bill — it’s about creating the conditions where your indoor air can actually be clean.
What Happens in an Under-Insulated Home
Your HVAC system works overtime to compensate — and the ripple effects touch everything:
- More cycling — The system runs longer and harder, fighting heat loss in winter and heat gain in summer
- Faster filter wear — More air passing through more often means more dust, dander, and pollen loading up your filter ahead of schedule
- Uneven comfort — Hot and cold spots, stuffy rooms, and drafts that never seem to go away
- Persistent allergens — Families often wonder why allergy symptoms don’t improve, even with a quality filter installed
We see these patterns every day in the thousands of customer conversations we have each year.
What Changes When Insulation Does Its Job
The difference is immediate — and it goes well beyond your utility bill:
- Your HVAC system runs less frequently and more efficiently
- Air filters last longer and capture particles more effectively — because air moves at the speed and volume the filter was designed for
- Rooms hold a consistent, comfortable temperature without constant cycling
- Energy bills drop
- The air your family breathes — during that 90% of life spent indoors — is noticeably better
Your Next Steps
You’ve done the research. Now here’s a clear, five-step path from estimate to results.
Step 1: Run Your Estimate
- Measure your space — Calculate the square footage of the area you’re insulating.
- Check existing insulation depth — Press a ruler into what’s already there. If you can see your attic floor joists, you need more.
- Find your climate zone — Use the DOE climate zone map to identify your target R-value.
- Enter your numbers — Plug them into the calculator above for an instant material and cost estimate.
Step 2: Pick Your Material
Choose between fiberglass, cellulose, and mineral wool. Each option has its function. For example, fiberglass is budget-friendly and moisture-resistant. Cellulose is eco-friendly. On the other hand, mineral wool is fire-resistant.
Quick tip from our team: In humid or coastal climates, prioritize moisture resistance. It’s the factor we hear homeowners wish they’d considered sooner.
Step 3: Check for Incentives
- Federal tax credits — Verify current eligibility at the IRS Energy Efficient Home Improvement Credit page. Recent legislation has changed the timeline
- State and local rebates — Many utility programs offer additional savings that stack with federal credits
- Save your receipts — Keep all product documentation and invoices for tax time
Step 4: Plan Your Install
Going the DIY route:
- Many stores offer free blower rentals with material purchase
- Buy ~10% more bags than your estimate to cover settling and irregular spots
Hiring a contractor:
- Use your calculator estimate as a baseline to compare quotes
- A solid number going in means no one oversells you on materials you don’t need
Step 5: Complete the Loop — Match Your Filter to Your Newly Insulated Home
This is the step most people skip — and the one that makes the biggest difference in day-to-day performance.
Once insulation is in, your HVAC runs less. The air that it does move needs to be filtered correctly.
Frequently Asked Questions
Q: How accurate is a blown-in insulation calculator?
A: A good calculator gets you within 10–15% of your actual material needs — more than close enough to set a realistic budget. The accuracy depends on the quality of the inputs you provide, not the tool itself.
From our experience, the most common mistakes are:
- Eyeballing attic square footage instead of measuring with a tape measure
- Guessing at existing insulation depth instead of pressing a ruler into the material
- Forgetting to add 10% to the final bag count for settling and irregular areas
Our advice: Measure twice, buy a few extra bags, and you won’t end up mid-project with a half-insulated attic. We’ve heard that story from homeowners more times than we can count.
Q: What R-value should I target when using a blown-in insulation calculator?
A: Your target R-value depends on your climate zone and where in the house you’re insulating.
General DOE recommendations:
- Attics: R-30 to R-60 (colder regions need the higher end)
- Walls: R-13 to R-21
Q: How many bags of blown-in insulation do I need?
A: Your bag count depends on three factors:
- Square footage of the area you’re covering
- Target R-value based on your climate zone
- Material type — each product has a different coverage rate per bag
Typical coverage examples at R-30:
- Cellulose: ~40–50 sq. ft. per bag
- Fiberglass: Varies by brand — always check the packaging specs
Our calculator handles the math automatically. Plug in your numbers and get a bag count you can shop with.
Q: Can I add blown-in insulation on top of existing insulation?
A: Yes — and this is one of blown-in insulation’s biggest advantages over batts or rolls. Loose-fill material conforms around what’s already there, filling gaps and compressed spots that have developed over time.
The one thing to check first — the condition of your existing insulation:
- Dry, intact, no mold or pest damage → Blow right on top
- Moisture problems, rodent droppings, or musty smell → Remove old material and fix the underlying issue first
Q: How does blown-in insulation affect my HVAC system and indoor air quality?
A: This is the question we wish more people asked — and the one closest to what we do every day at Filterbuy.
The immediate impact on your HVAC system:
- Shorter run times — System reaches set temperature faster, shuts off sooner
- Less equipment wear — Fewer cycles per day means less strain on your compressor and blower motor
- Lower energy bills — Less runtime equals less energy consumed
The pattern we’ve seen over 10+ years and millions of filters shipped: Homeowners who get the best air quality and lowest energy bills treat insulation and filtration as one connected system — not two separate projects.
- Insulation keeps the conditioned air in
- Filtration keeps the pollutants out
- Together, they protect your family, your home, and your HVAC system
Get Your Blown-In Insulation Estimate — Then Let Us Help You Finish the Job
Run your numbers with our blown-in insulation calculator above and take the first step toward a more comfortable, energy-efficient home. When you’re ready to complete the efficiency loop with the right air filter for your newly insulated space, we’ve got 600+ sizes, expert guidance, and free shipping ready to go — because better air starts with a plan, and we’re here to help you see it through.