You’ll require a few essential tools to handle that lint trap expertly: a lint brush, vacuum cleaner, rubber gloves, plus a flashlight for very tricky dryer crevices. Safety stands paramount. Unplug the dryer beforehand; no one wants a jolt in the laundry room. It’s typically located on top or near the front, ready to catch every fluff. Seize your brush and begin a gentle scrubbing session.
Faced with clingy bits of lint? Your vacuum cleaner will handle that hassle. Afterward, run it briefly under warm water for absolutely perfect results (remember, no soap!).

Why a Spotless Lint Trap Keeps Your Dryer Safe and Swift
Cleaning out that fluffy buildup might look simple, yet a pristine lint trap safeguards both safety and peak performance. An unblocked vent accelerates drying, so clothes emerge toasty in fewer spins. Conversely, a lint-laden trap overworks your machine, inflating energy bills and straining its system.
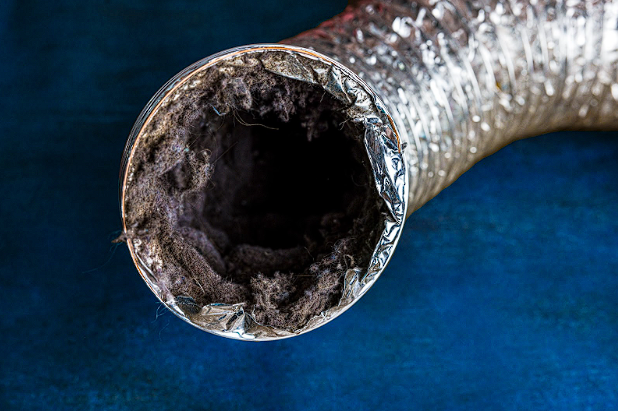
But lurking beneath all that softness is a hidden threat. Lint, despite its harmless appearance, can spark serious hazards. Reports from the U.S. Fire Administration link over 2,900 household blazes each year to dryer mishaps, often tied to neglect. With its flammable nature, lint ignites under high heat, and a clogged trap amplifies the risk by raising interior temperatures dangerously.
Collecting the Essentials for Thorough Lint Removal
A proper lint-trap cleanse demands the right gear. Start with a deep-reaching brush that wrestles out stubborn fluff. Partner it with a vacuum cleaner’s suction, ensuring every liberated fiber is whisked away. Many brushes feature bendable shafts that maneuver through twists in the dryer vent.
Rubber gloves also earn their place. They shield your hands from dryness and provide a dependable grip on tools. No one wants gritty, lint-covered fingers.
Lastly, have a flashlight in your arsenal. These dark recesses hide stray fibers, and a quick beam reveals overlooked corners. Keep a cloth handy to swipe away any leftover debris on the dryer’s exterior. For a broader approach to better indoor air quality, Filterbuy HVAC solutions can help keep your entire home’s airflow in check.
Detailed Steps for a Lint Trap Overhaul
Methodical maintenance propels your dryer’s efficiency. First, disconnect its power to avoid nasty jolts. Seek out the lint screen—often perched on top or just inside the door—and gauge how congested it looks. Pull it free, then carefully brush away threads, focusing on tight edges. Once loosened, deploy the vacuum or a crevice tool to banish every last piece of lint. Give the screen a light rinse under warm water—skip the soap to preserve airflow—and allow it to dry before placing it back. With this routine, your dryer runs smoother and serves you far longer.
Staying Fire-Free: Mastering Dryer Maintenance
Your dryer quietly transforms damp laundry into cozy, ready-to-wear garments. Yet, beneath every warm tumble lurks the potential hazard of lint buildup. A simple commitment to cleaning prevents hidden fibers from sabotaging performance and threatening household safety.
Fire risks often revolve around trapped lint, blocked vents, and unpredictable overheating. Clearing lint regularly stands as a frontline defense: fewer blockages mean smoother airflow, balanced temperatures, and less strain on the motor. Incorporating a thorough check of the dryer vent and ductwork every few months boosts peace of mind. For broader home ventilation needs, Filterbuy HVAC solutions provide robust support in keeping airflow clean and safe.
A practical maintenance schedule wards off premature wear and costly breakdowns. Consistent inspections spot trouble before it flares, and quick fixes keep your dryer humming along. Overloading the drum can hasten burnout, so staying mindful of load size defends the machine’s lifespan.
Pro Tips for Effective Lint Removal
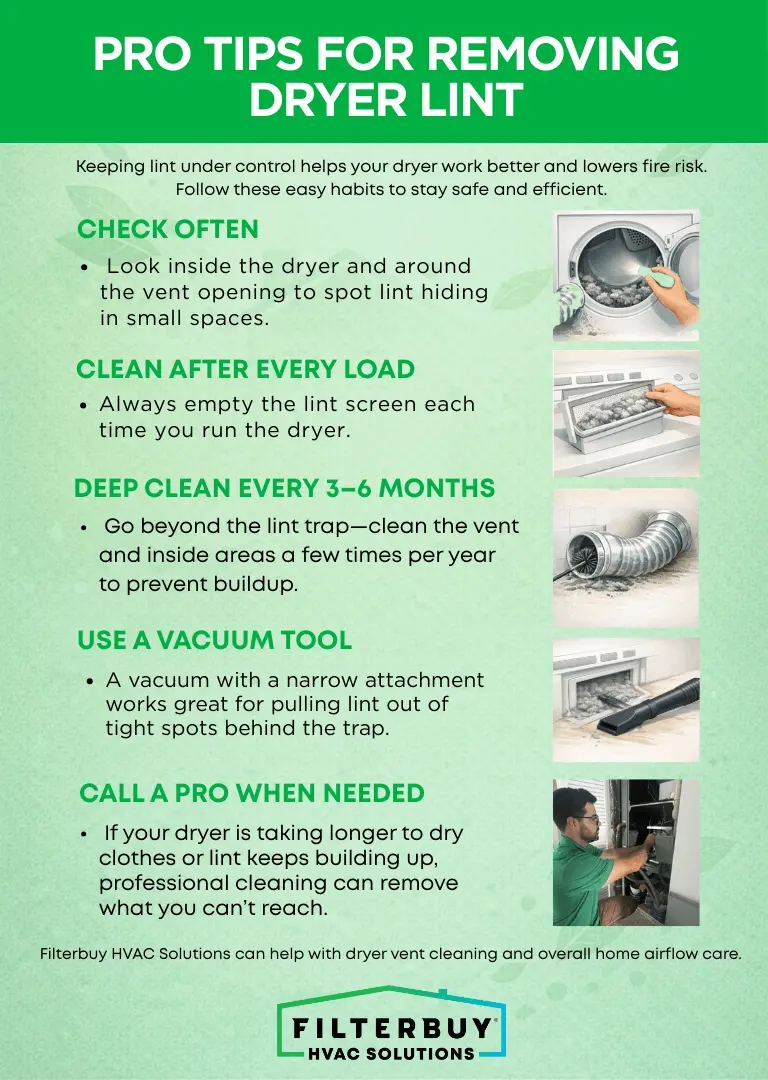
Seasoned homeowners swear by a methodical approach: they track lint levels and tweak their routine accordingly. For maximum efficiency, pair each dryer cycle with a quick trap check and plan deep cleans a few times per year. Filterbuy HVAC solutions can also assist in broader home upkeep.
- Regular Scans: Peek inside the dryer’s nooks and around the exhaust vent to catch sneaky fibers.
- Routine Overhauls: Emptying the lint screen after each run isn’t enough—commit to a full cleaning every 3-6 months.
- Targeted Suction: A vacuum with a narrow nozzle conquers trapped lint in tight spots, especially behind the trap.
- Call in Reinforcements: When fluffy buildup proves unyielding or the dryer slows to a crawl, professional help banishes lingering debris.
Frequently Asked Questions
How do you deep clean a lint filter?
Experts recommend using a vacuum with a soft brush attachment to remove stubborn lint from deep crevices without damaging the filter.
Can I wash a lint trap?
Yes, washing your lint trap can boost dryer efficiency and safety. Remove the trap and gently use a soft brush to dislodge the lint before rinsing.
How do I know if my lint trap is clogged?
A clogged lint trap often causes longer drying times, overheating, and a burning smell. You may also notice damp or overly warm clothes after drying.
How do you clean lint off vents?
A vent brush, flexible rod, or vacuum attachment can help loosen and remove lint from vents, ensuring precise airflow for optimal dryer performance.
How do I remove the buildup from the lint trap?
Regular, thorough cleaning prevents lint buildup, minimizes fire risks, and avoids costly repairs—keeping your home and dryer safe.
How do you deep clean an air filter?
Gently brush off accumulated dust with a soft brush or vacuum attachment. Rinse the filter with warm water and a mild detergent for a deeper clean.
How often should lint filters be cleaned?
Clean the lint filter after every dryer cycle for best performance and safety.
How do you get rid of severe lint buildup?
Use a vacuum with an extended hose attachment to reach deep into the ductwork. If the buildup is significant, it may be wise to consult a professional.
What happens if you don’t clean the lint filter?
Neglecting the lint filter can restrict airflow, causing the dryer to overheat and work less efficiently. This increases drying times, raises the risk of fire, and shortens the dryer’s lifespan.
How do you shave off lint?
A fabric shaver can trim lint balls from clothing for a cleaner look. Alternatively, adhesive tape or lint rollers can effectively remove lint from fabrics.
How often should I clean my dryer vent?
Professionals suggest cleaning the dryer vent every three to twelve months, depending on usage. Reduced efficiency or a burnt smell are good indicators that cleaning is needed.
Can you clean the lint filter with water?
Yes. Begin by removing as much lint as possible by hand. Then, gently scrub the filter and trap using a soft brush with a non-abrasive cleaner and lukewarm water. Rinse thoroughly and allow it to dry before reinstalling.